General description If you're familiar with SMD soldering, you probably know about the 858 series of chinese-made, el-cheapo SMD rework stations. There are probably tens of small companies manufacturing these stations (Atten, Baku, Scotle, YOUYUE, KADA, W.E.P, Saike, YIHUA, BEST, Quick, etc.). Of course, on the exterior they almost all look the same. The internals are quite different though, some of them use the Mikkon MK1841D3 microcontroller (which according to a thread over at eevblog is a clone of Samsung S3F9454), a Holtek HT46R23 or an AVR MCU.
The AVR-based ones are much better value since they're reprogramable, but there's no way to tell which station uses which MCU based on their looks. One model known to use an Atmega8 MCU is the Youyue 858D+.
 |
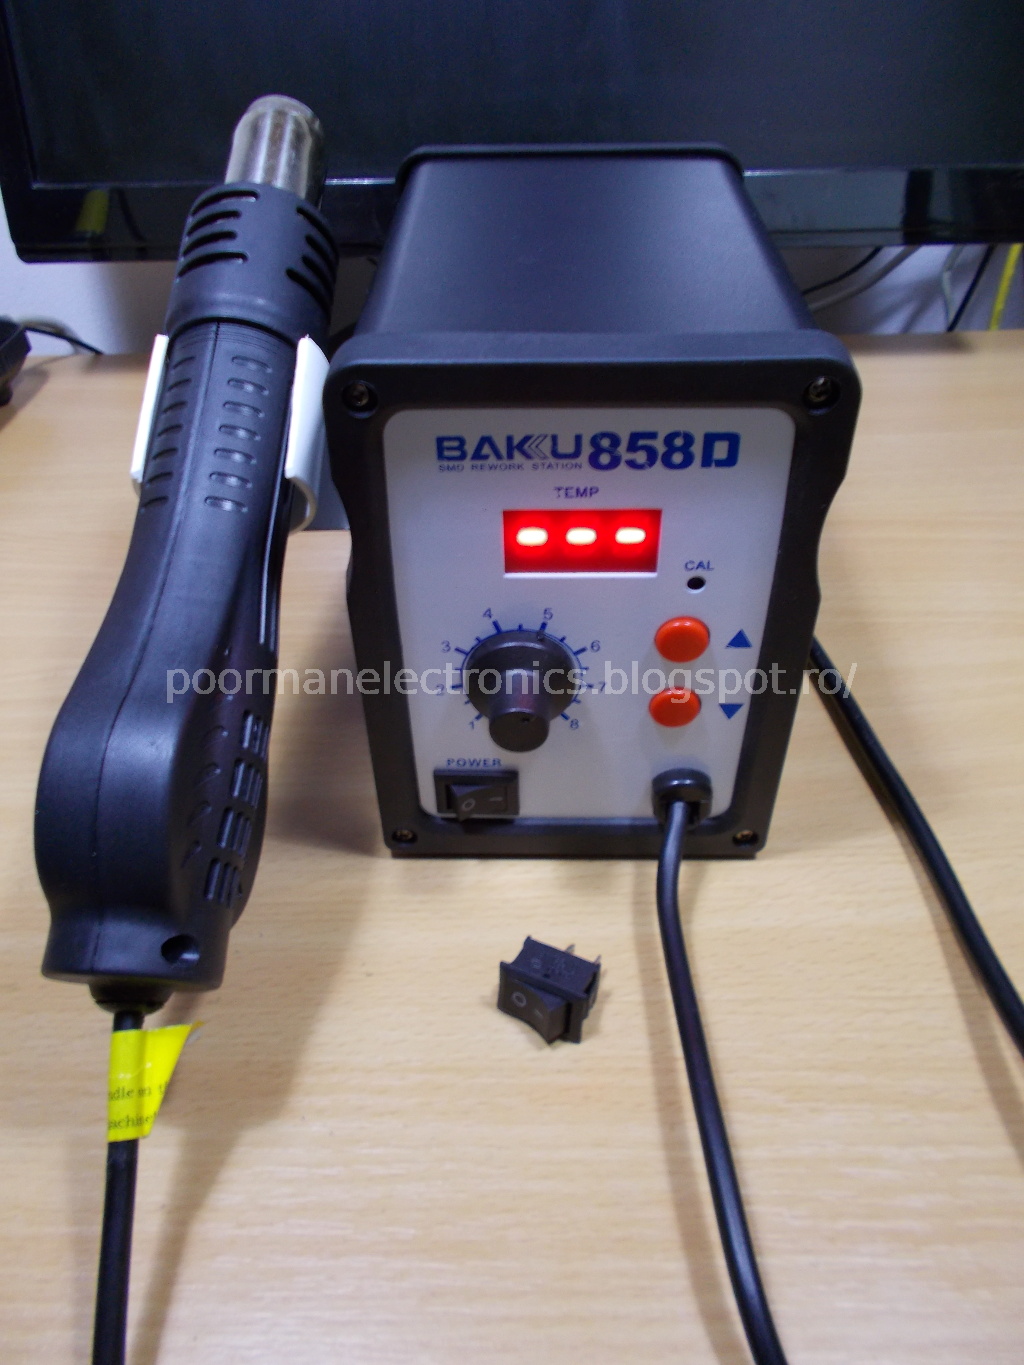
| BAKU 858D SMD rework station |
Unfortunately mine ( BAKU 858D ) uses the MK1841D3 which is an OTP (one-time programmable) MCU so there is no way to tinker with it or write my own firmware. On the more positive side, it works quite well as-is, except for some minor quirks, like the temperature overshoot when turning it on and the overall quality of the components.
Recently the power button from my unit has broken off so I opened it up to replace it and also made some pictures of the interior. Hopefully these will help someone make a general idea of this model's quality and also help compare it with other "brands".
 |
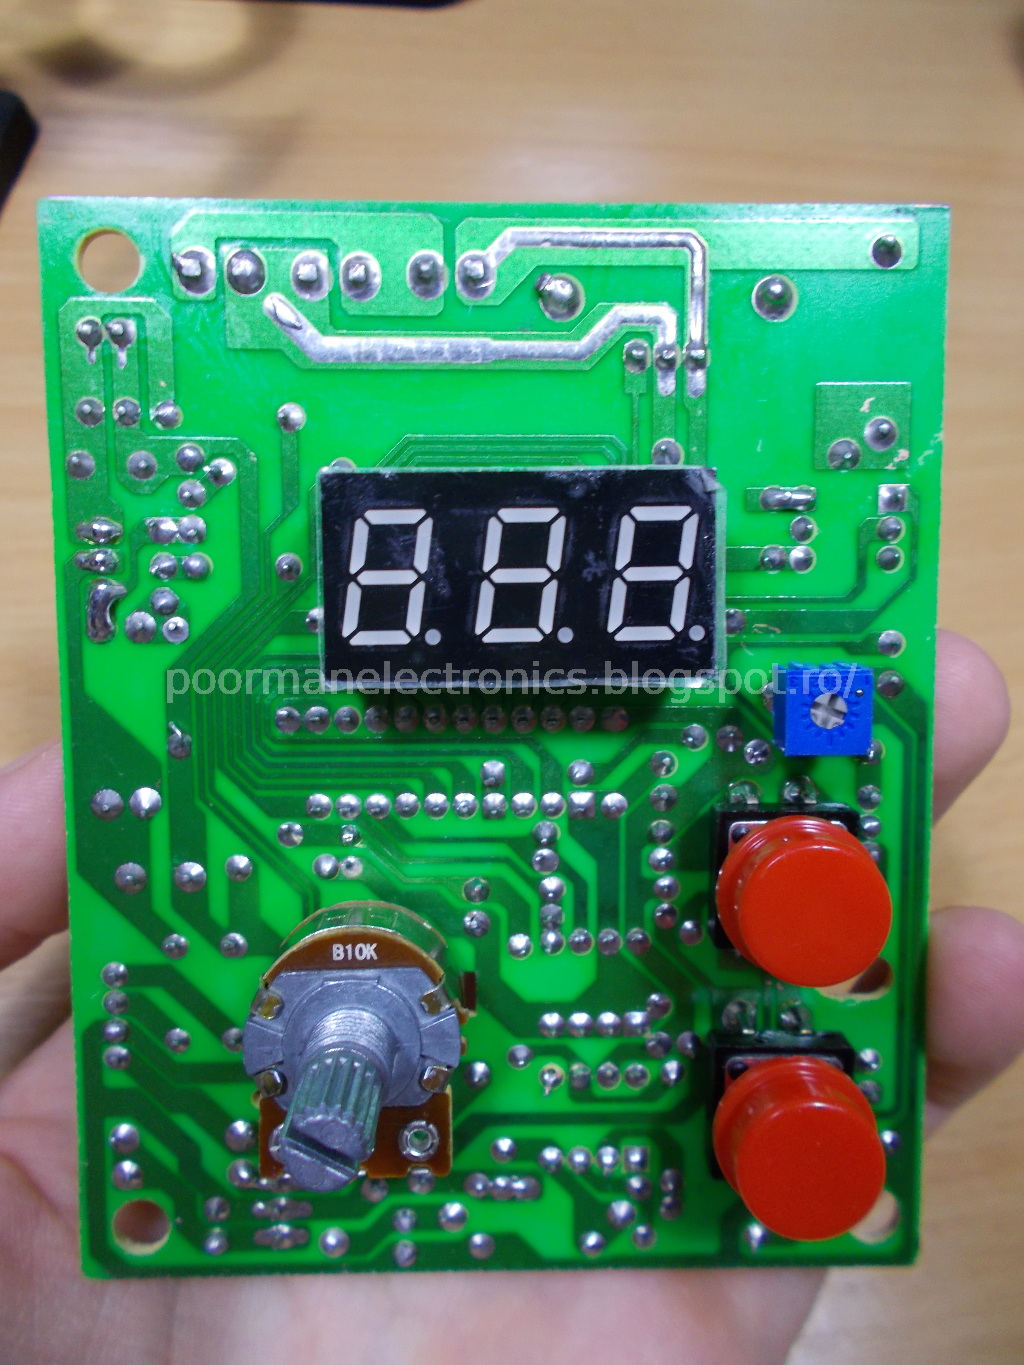
| PCB reverse. Please note the crapacitors. |
 |
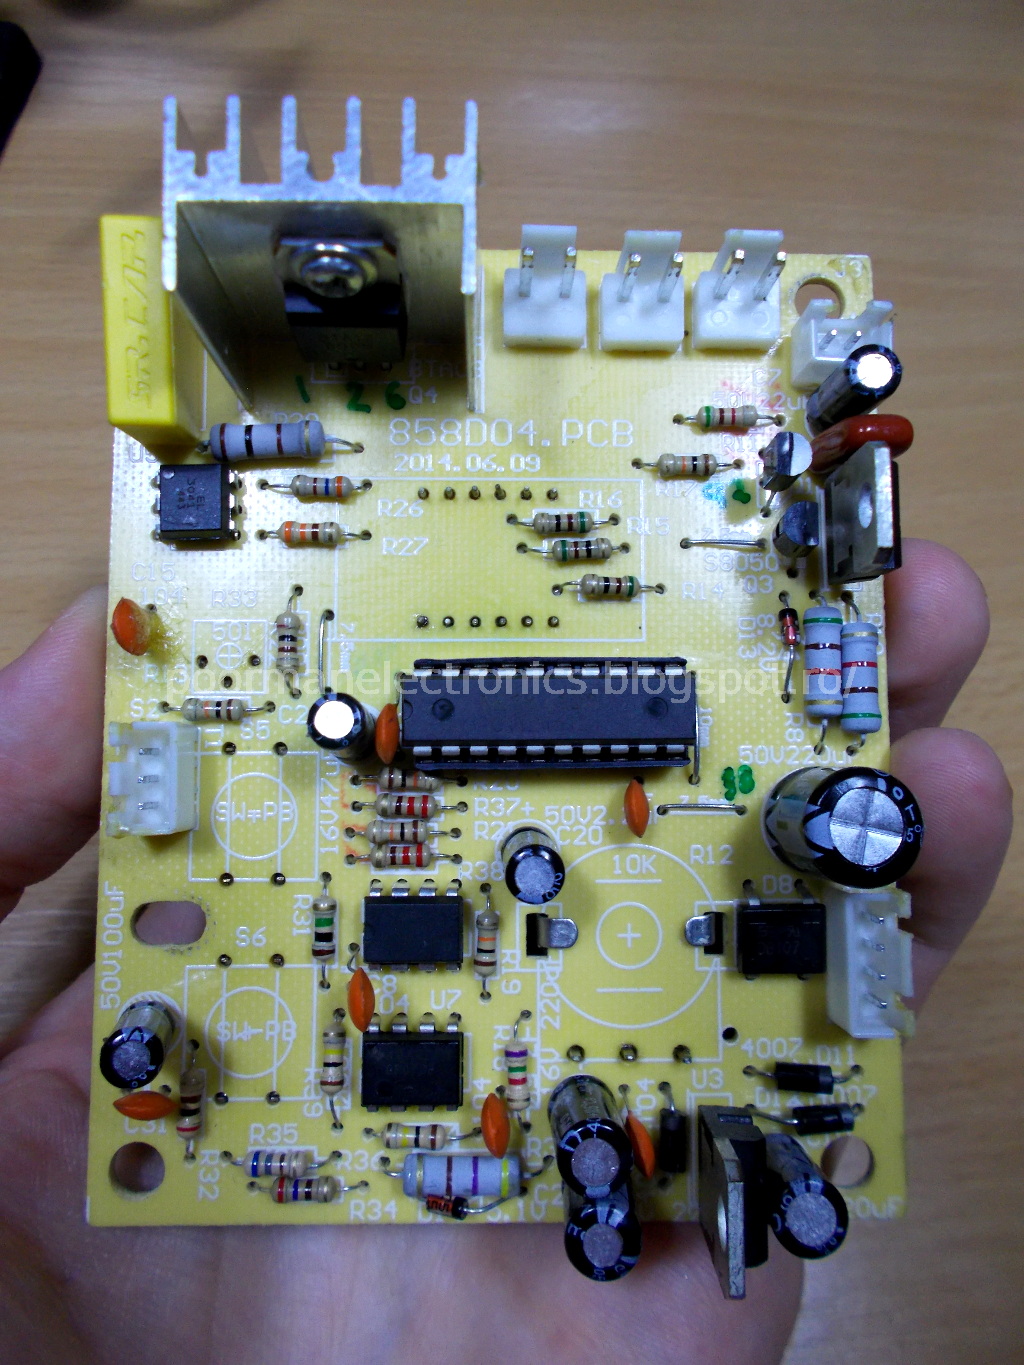
| Front of the PCB. Nothing fancy over here either |
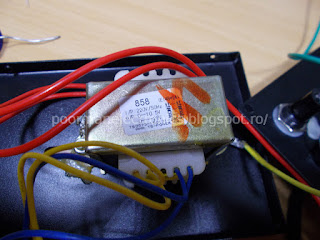 |
| The main transformer. 2 windings, one for the fan (25V) and one for the controller (10V) |
One nice thing about these units is that they use a centrifugal fan instead of the membrane air pump like the older stations from Gordak. There is much less noise and vibration, not to mention they're more reliable. There's no heat generated inside and they can provide good airflow, up to 120 l/min (compared to 24 l/min for diaphragm pumps).
 |
| The blower fan |
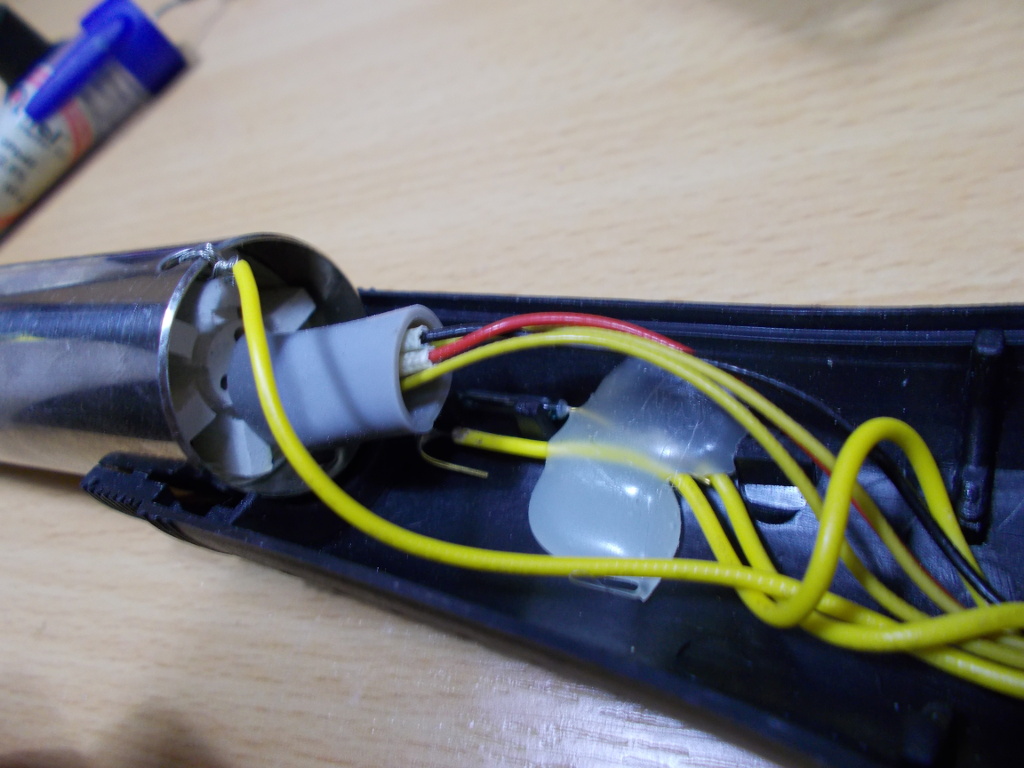
Both the heater and the fan are located in the hot air wand, an improvement over the older stations. This way the unit case is smaller since it only hosts the control circuitry and the transformer.
 |
| Wiring in the hot air wand |
 |
| The heating element connections and the reed switch |
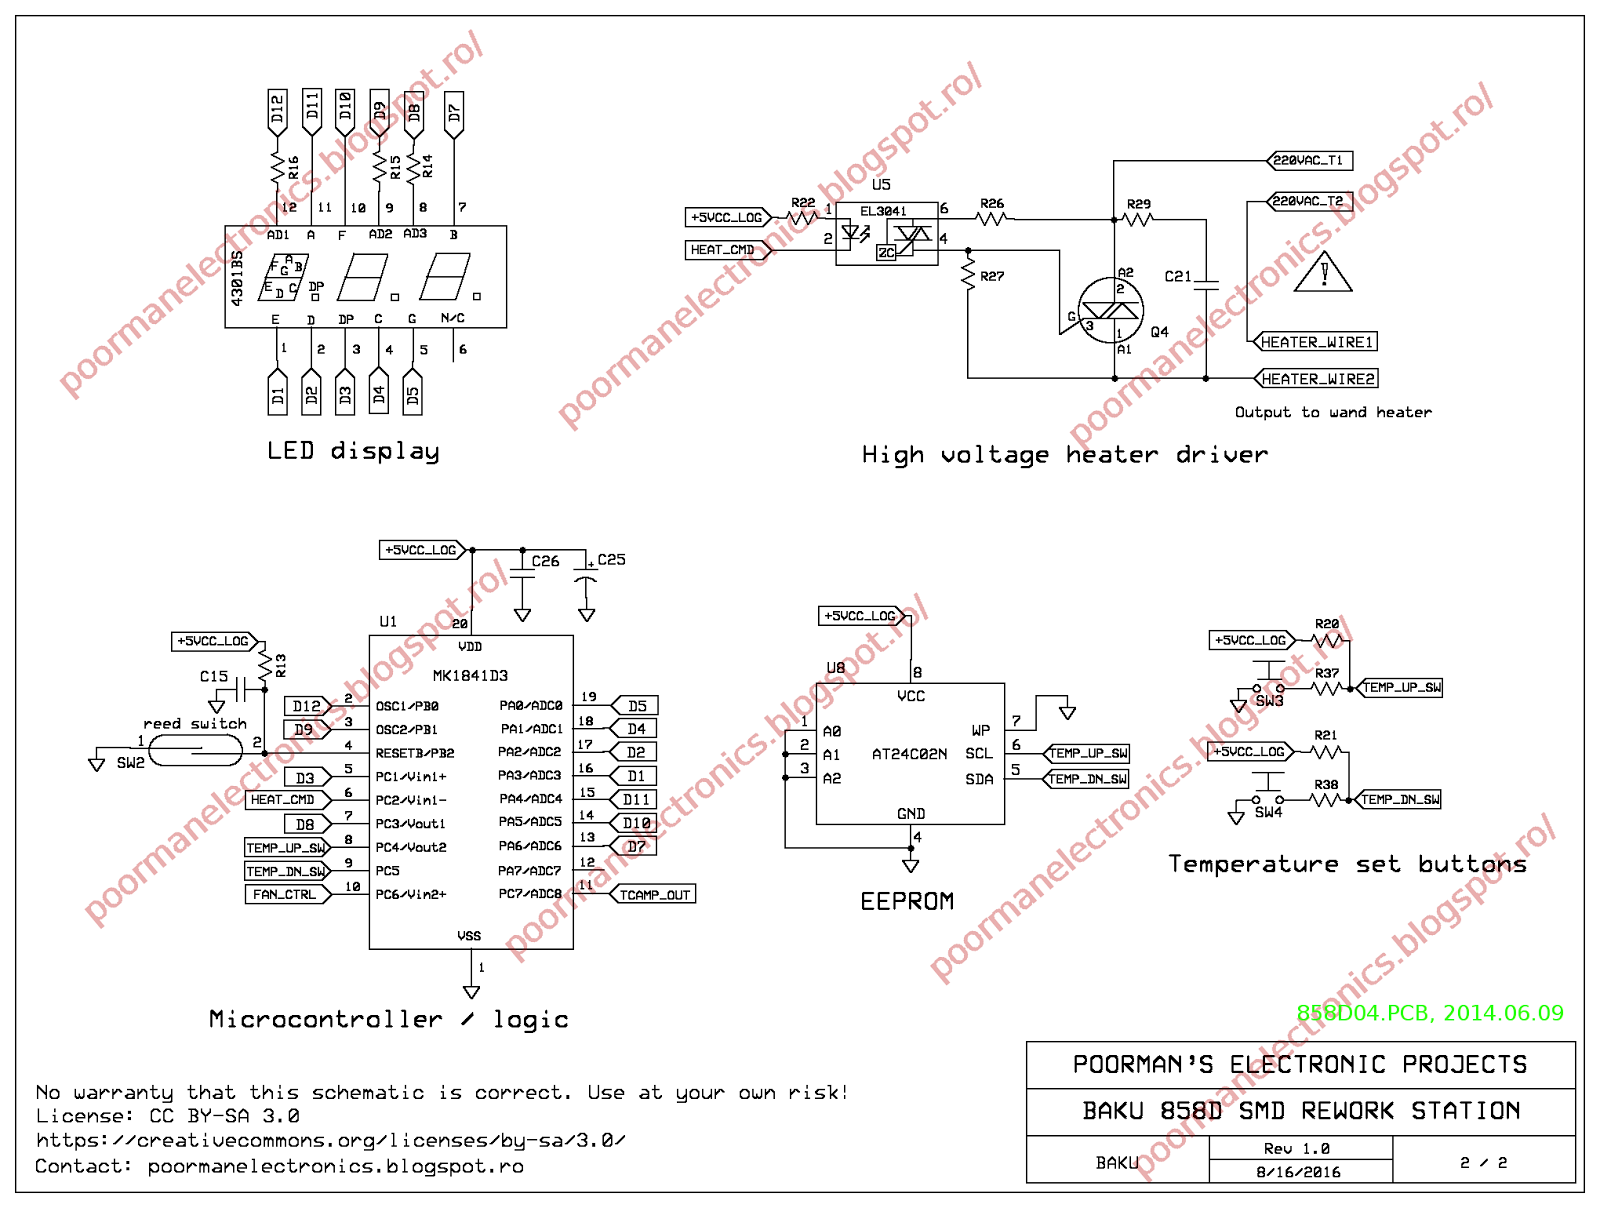
The schematic I had a little bit of free time so, as an exercise of patience I have reverse engineered the PCB and made a schematic for this unit. At the time of writing this, this is the only complete schematic for this model (Baku 858D, 858D04.PCB from 2014.06.09). The main reason for drawing it is for future troubleshooting. An interesting idea would be to modify the schematic to work with an AVR instead of the Mikkon MCU. The rest of the circuit seems to be well designed, no modifications are required.
Note that the schematic drawing might have mistakes. It comes without any warranty of any kind, use it at your own risk.
 |
| 858D schematic part 1 |
 |
| 858D schematic part 2 |
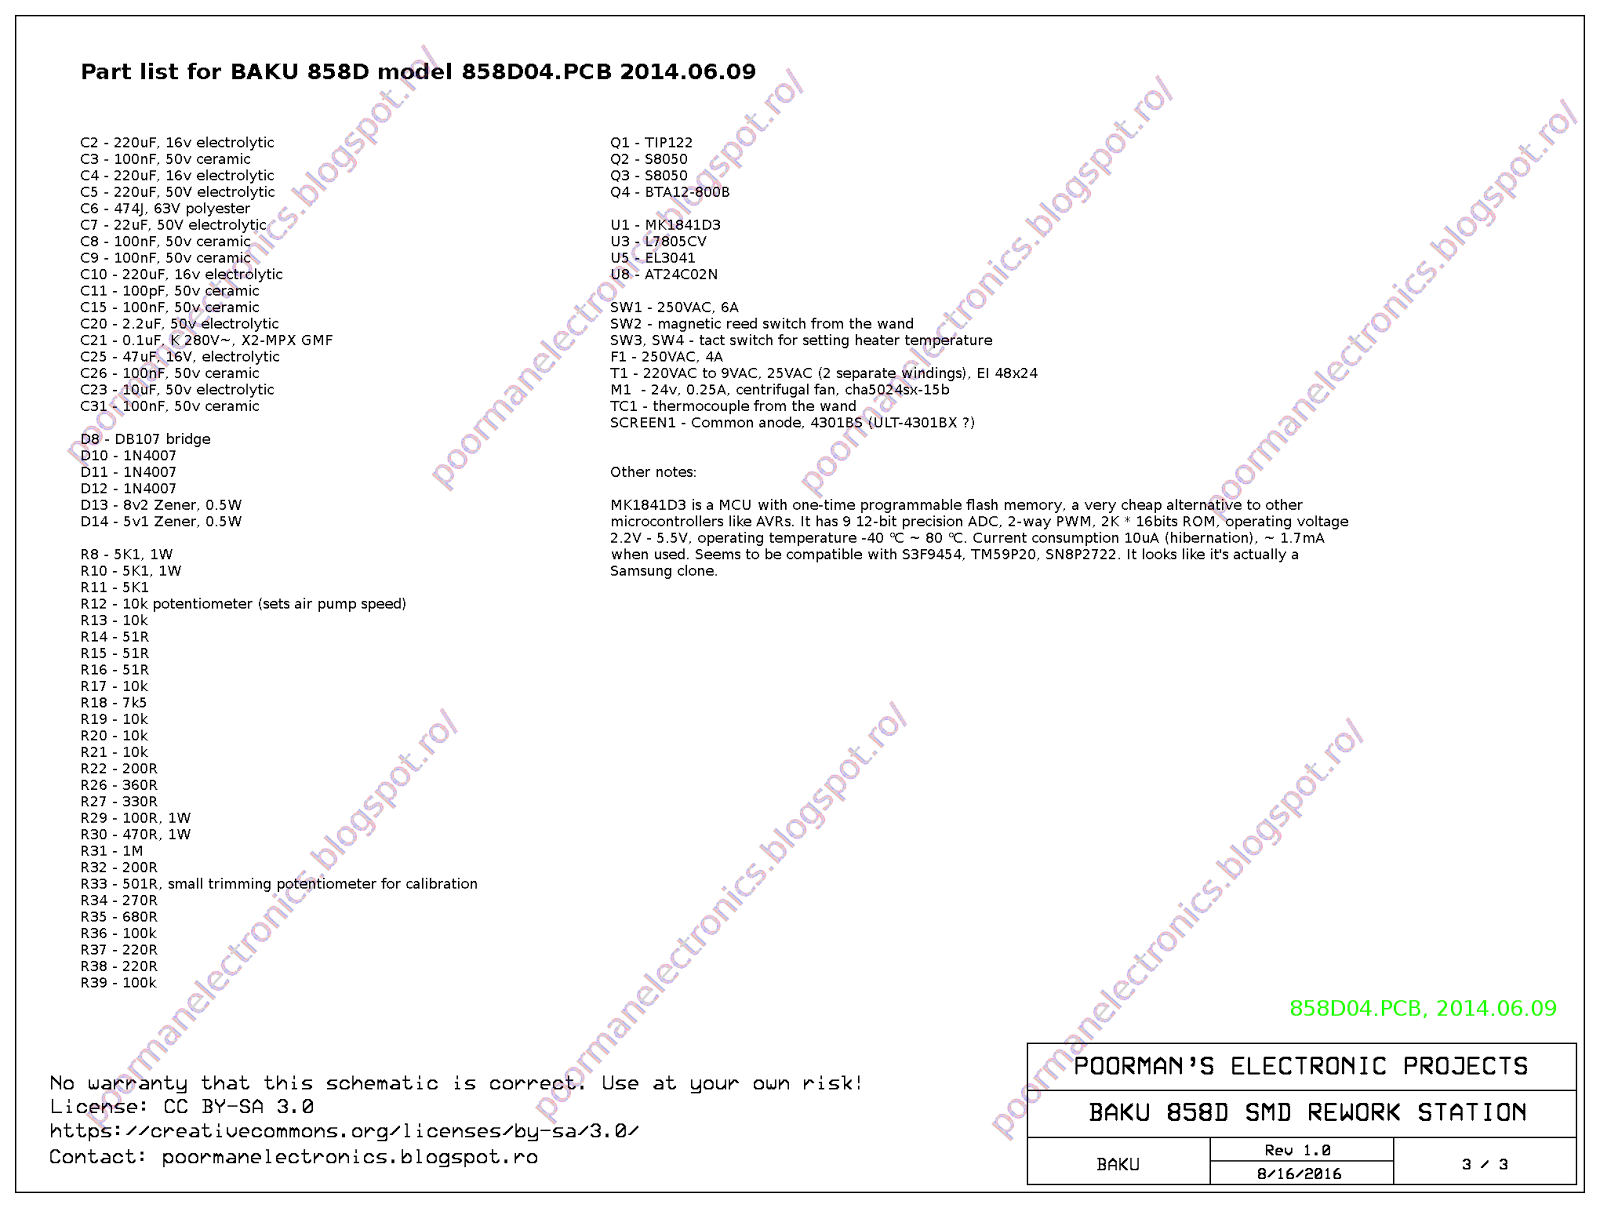
 |
| 858D schematic parts list |
Conclusion All in all, this type of rework station is quite decent, I recommend it over the old Gordak stations which were noisy and bulky. What I don't recommend is getting this exact model. If you want to buy an 858D, find one which is better built by looking at the comments on the seller's site. Maybe a Youyue 858D+ would be the best choice (since it uses an Atmega8 MCU).
________________________________________________________________________________________________________

Â
Â
Â

Â
|
Modelo
|
BK-878L
|
|
Tipo de
|
Pistola de aire y soldadora 2 en 1
|
|
CaracterĂstica
|
Pantalla Digital LED
|
|
Consumo de energĂa
|
700W
|
|
TensiĂłn de entrada
|
220V / 110V
|
|
Ventilador
|
Ventilador sin escobillas, aire giratorio suave
|
|
El volumen de aire
|
120L/M.
|
|
Rango de temperatura
|
200 ° c ~ 480 ° c
|
|
Adaptador de corriente
|
Enchufe estadounidense 110V/Enchufe europeo 220V
|
|
AplicaciĂłn
|
Para teléfonos móviles, electrónica, placa lógica, reparación de BGA
|
Â
CaracterĂsticas:
1. Los productos cuentan con un circuito cerrado de transductor. ÂżPantalla LED Digital? ÂżDe alta potencia?
2. El flujo de aire puede ser ajustable y el soplado de aire es grande y los componentes de plåstico de soplado suave no se deformarån. Como el zumbador y la interfaz externa del teléfono móvil.
3. Es inductancia en el mango. FuncionarĂĄ rĂĄpidamente cuando tomas el mango, cuando el mango vuelva al estante, la mĂĄquina se detendrĂĄ automĂĄticamente.
4. AutomĂĄtica para soplar aire frĂo para asegurar el calentamiento. La temperatura aumenta rĂĄpidamente y puede alcanzar la temperatura de ajuste solo en 3 o 5 segundos. Volumen pequeño, peso ligero, control de temperatura con precisiĂłn.
5. Retire BGA de forma segura, mantenga los pines intactos. Mucho mĂĄs seguro y confiable. El soplado de PCB no lo harĂĄ blister.
Â
AplicaciĂłn:
- Gama completa de aplicaciones de retrabajo en centros de servicio a escala media y grande;
- ReparaciĂłn de dispositivos de sistemas mĂłviles y de radio;
- Teléfonos móviles, PDAs, teléfonos móviles, ordenadores portåtiles, ordenadores portåtiles y reparación de placas base;
- LAN, nodos de red y reparaciĂłn de equipos de sistemas de comunicaciones militares.
Â


Â
Mantenimiento de la estaciĂłn de soldadura de hierro
Antes de la soldadura
- Debe mojarse la esponja de limpieza primero y exprimir el exceso de agua. Estos pasos ayudarĂĄn a que la punta del soldador mantenga un buen efecto de limpieza.
- Si no se usa una esponja de limpieza en hĂșmedo, la punta de hierro de soldadura se verĂĄ dañada y difĂcil de planchar.
Después de la soldadura
- Por favor, regule la temperatura a 250 grados Celsius, empezando a limpiar la punta del soldador y recubrir una nueva capa de estaño para mayor protección.
- Cuando no necesitamos usar el soldador, debemos tapar la punta de hierro con estaño para evitar que se oxide. Porque una vez que la punta de hierro se oxida, la punta de hierro de soldadura es muy difĂcil de derretir la lata. Incluso has regulado la temperatura a 450 grados centĂgrados, aĂșn no se puede derretir. El estaño es muy importante.
AtenciĂłn
Mejor para soldar con baja temperatura
- La alta temperatura acelerarĂĄ la punta del soldador y acortarĂĄ su vida Ăștil. Cuando la temperatura de la punta de hierro de soldadura es de hasta 470 grados Celsius, su velocidad de oxidaciĂłn es dos veces mĂĄs rĂĄpida que 380 grados Celsius.
No pulses mucho la punta de hierro
- Al soldar, no pulses mucho la punta del soldador. De lo contrario, la punta se dañarĂĄ y deformarĂĄ. Siempre que la punta del soldador pueda acceder completamente al punto de soldadura, el calor puede transferir. AdemĂĄs, la selecciĂłn de una punta de hierro de soldadura adecuada tambiĂ©n es Ăștil para transferir calor.
A menudo mantiene la Estaño
- ReducirĂĄ la oxidaciĂłn de la punta de soldadura de hierro y ampliarĂĄ su vida Ăștil. DespuĂ©s de usarlo, coloque una nueva capa de estaño cuando la temperatura de la punta sea mĂĄs baja.
Mantenga la punta de hierro de soldadura limpia y limpia el Ăłxido
- Si hay óxido negro en la punta del soldador, es probable que no pueda planchar estaño. En este caso, necesita limpieza inmediatamente. Regule la temperatura a 250 grados Celsius, use la esponja de limpieza para limpiar el óxido en la punta de hierro y la placa de estaño finalmente.


Apparently not all of the Youyue 858D units are the same. I just bought one, but it has the exact same board as your 858D.
ReplyWith the help of your schematics, I will make an adapter board so I can run some custom firmware on it.